An interactive light and sound object that reacts to the user's hand movements. Collaboration With Katie Burton.
The Challenge:
To create a user experience with a 3D object in which sound can be explored in a compelling way.
Synesthesia
An interactive light and sound object that reacts to the user's hand movements. Collaboration With Katie Burton.
The Challenge:
To create a user experience with a 3D object in which sound can be explored in a compelling way.
Synesthesia
An interactive light and sound object that reacts to the user's hand movements. Collaboration With Katie Burton.
The Challenge:
To create a user experience with a 3D object in which sound can be explored in a compelling way.
Design Process
With sound being the main component of the object, we wanted to find a way to amplify it and make it really enjoyable to use. To achieve this, we added another component: light. The idea was to use light as a form of sound visualization, thus creating a multi sensory object.
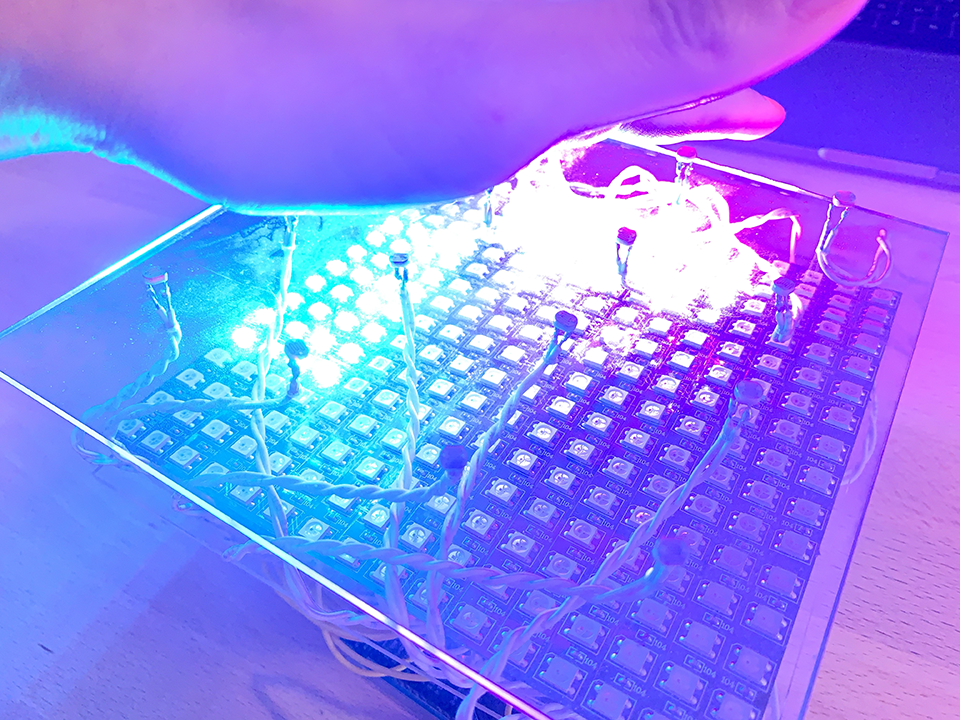
To activate the sound and lights, we decided to use sensors that would detect hand movements and react accordingly. We thought this would be the most natural and instinctive way for the user to interact with the object.
When December 2018
Duration 4 Weeks
Tools Arduino
Role Design + Circuits + Programming
Sound & Light
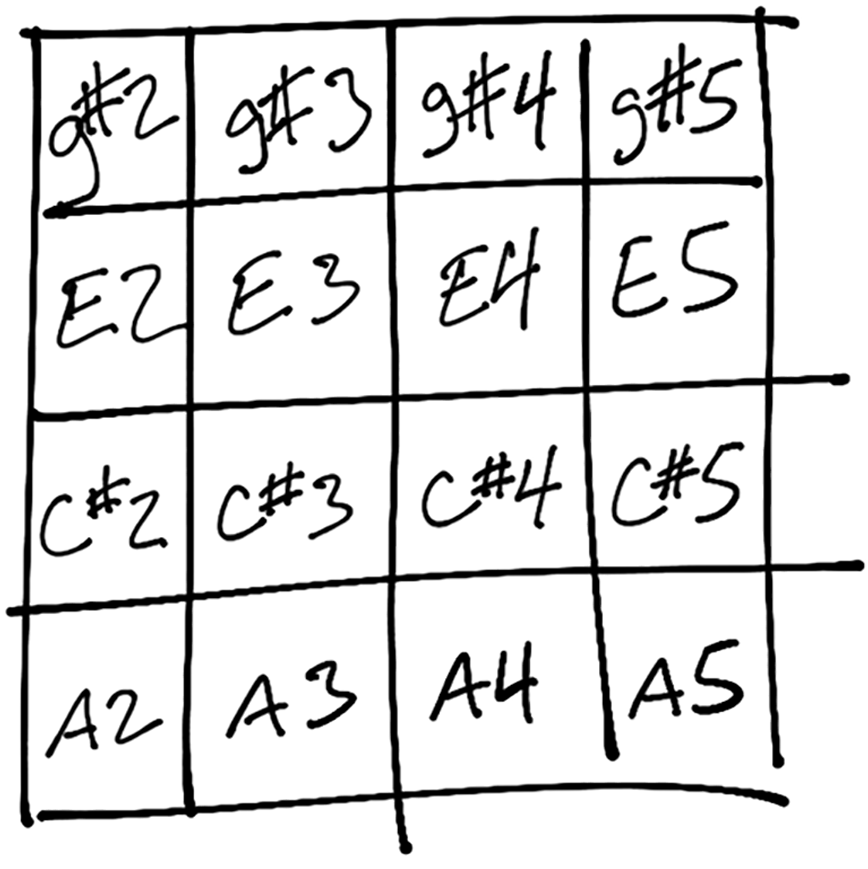
To make the sound harmonious with any combination of notes, we chose the scale C natural minor to base the frequencies around. Each row was assigned a single note, and each column a single octave.
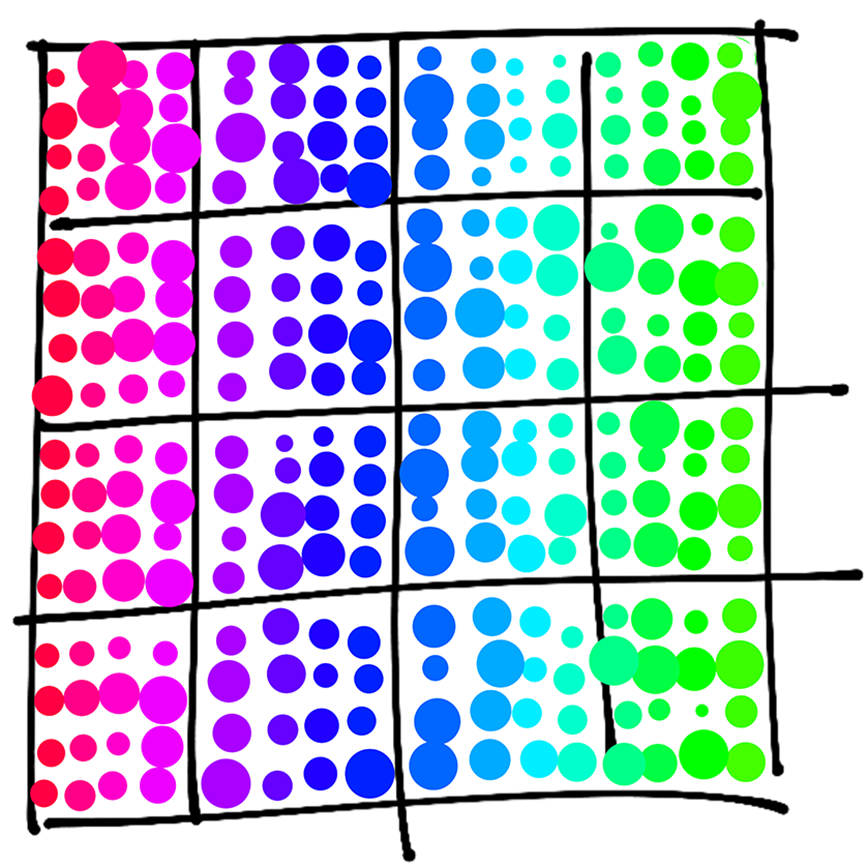
Following the concept of harmony, we used a progressive rainbow effect for the lights. We wanted the colours to look as if they were flowing along the device, so we applied a colour wheel sequence to the lights to get this effect.
Design Process
With sound being the main component of the object, we wanted to find a way to amplify it and make it really enjoyable to use. To achieve this, we added another component: light. The idea was to use light as a form of sound visualization, thus creating a multi sensory object.
To activate the sound and lights, we decided to use sensors that would detect hand movements and react accordingly. We thought this would be the most natural and instinctive way for the user to interact with the object.
When December 2018
Duration 4 Weeks
Tools Arduino
Role Design + Circuits + Programming
Sound & Light
To make the sound harmonious with any combination of notes, we chose the scale C natural minor to base the frequencies around. Each row was assigned a single note, and each column a single octave.
Following the concept of harmony, we used a progressive rainbow effect for the lights. We wanted the colours to look as if they were flowing along the device, so we applied a colour wheel sequence to the lights to get this effect.
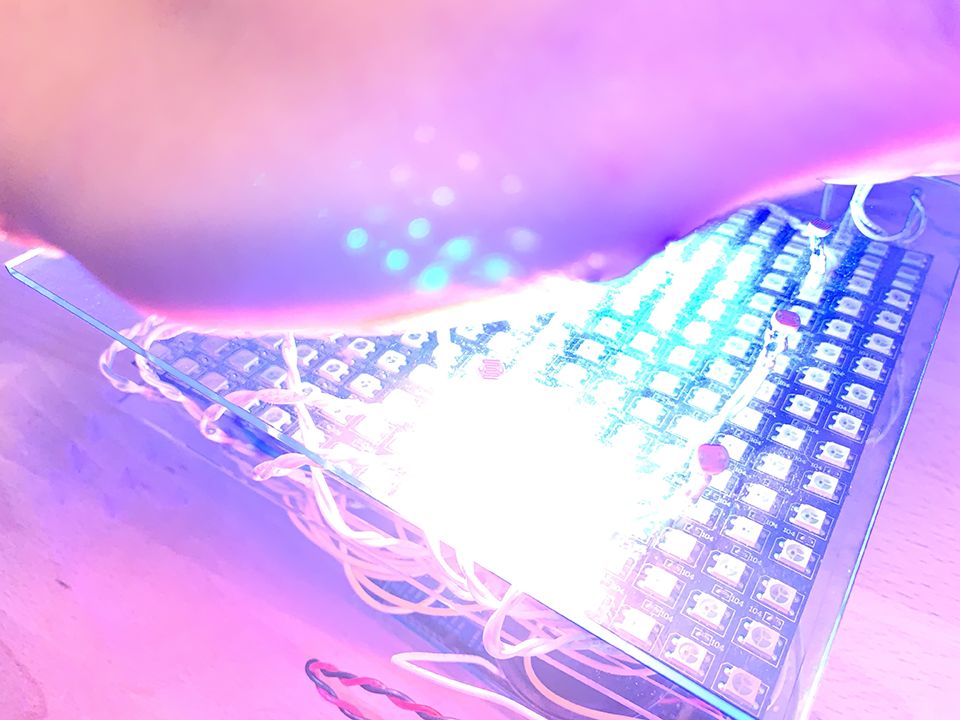
Implementation
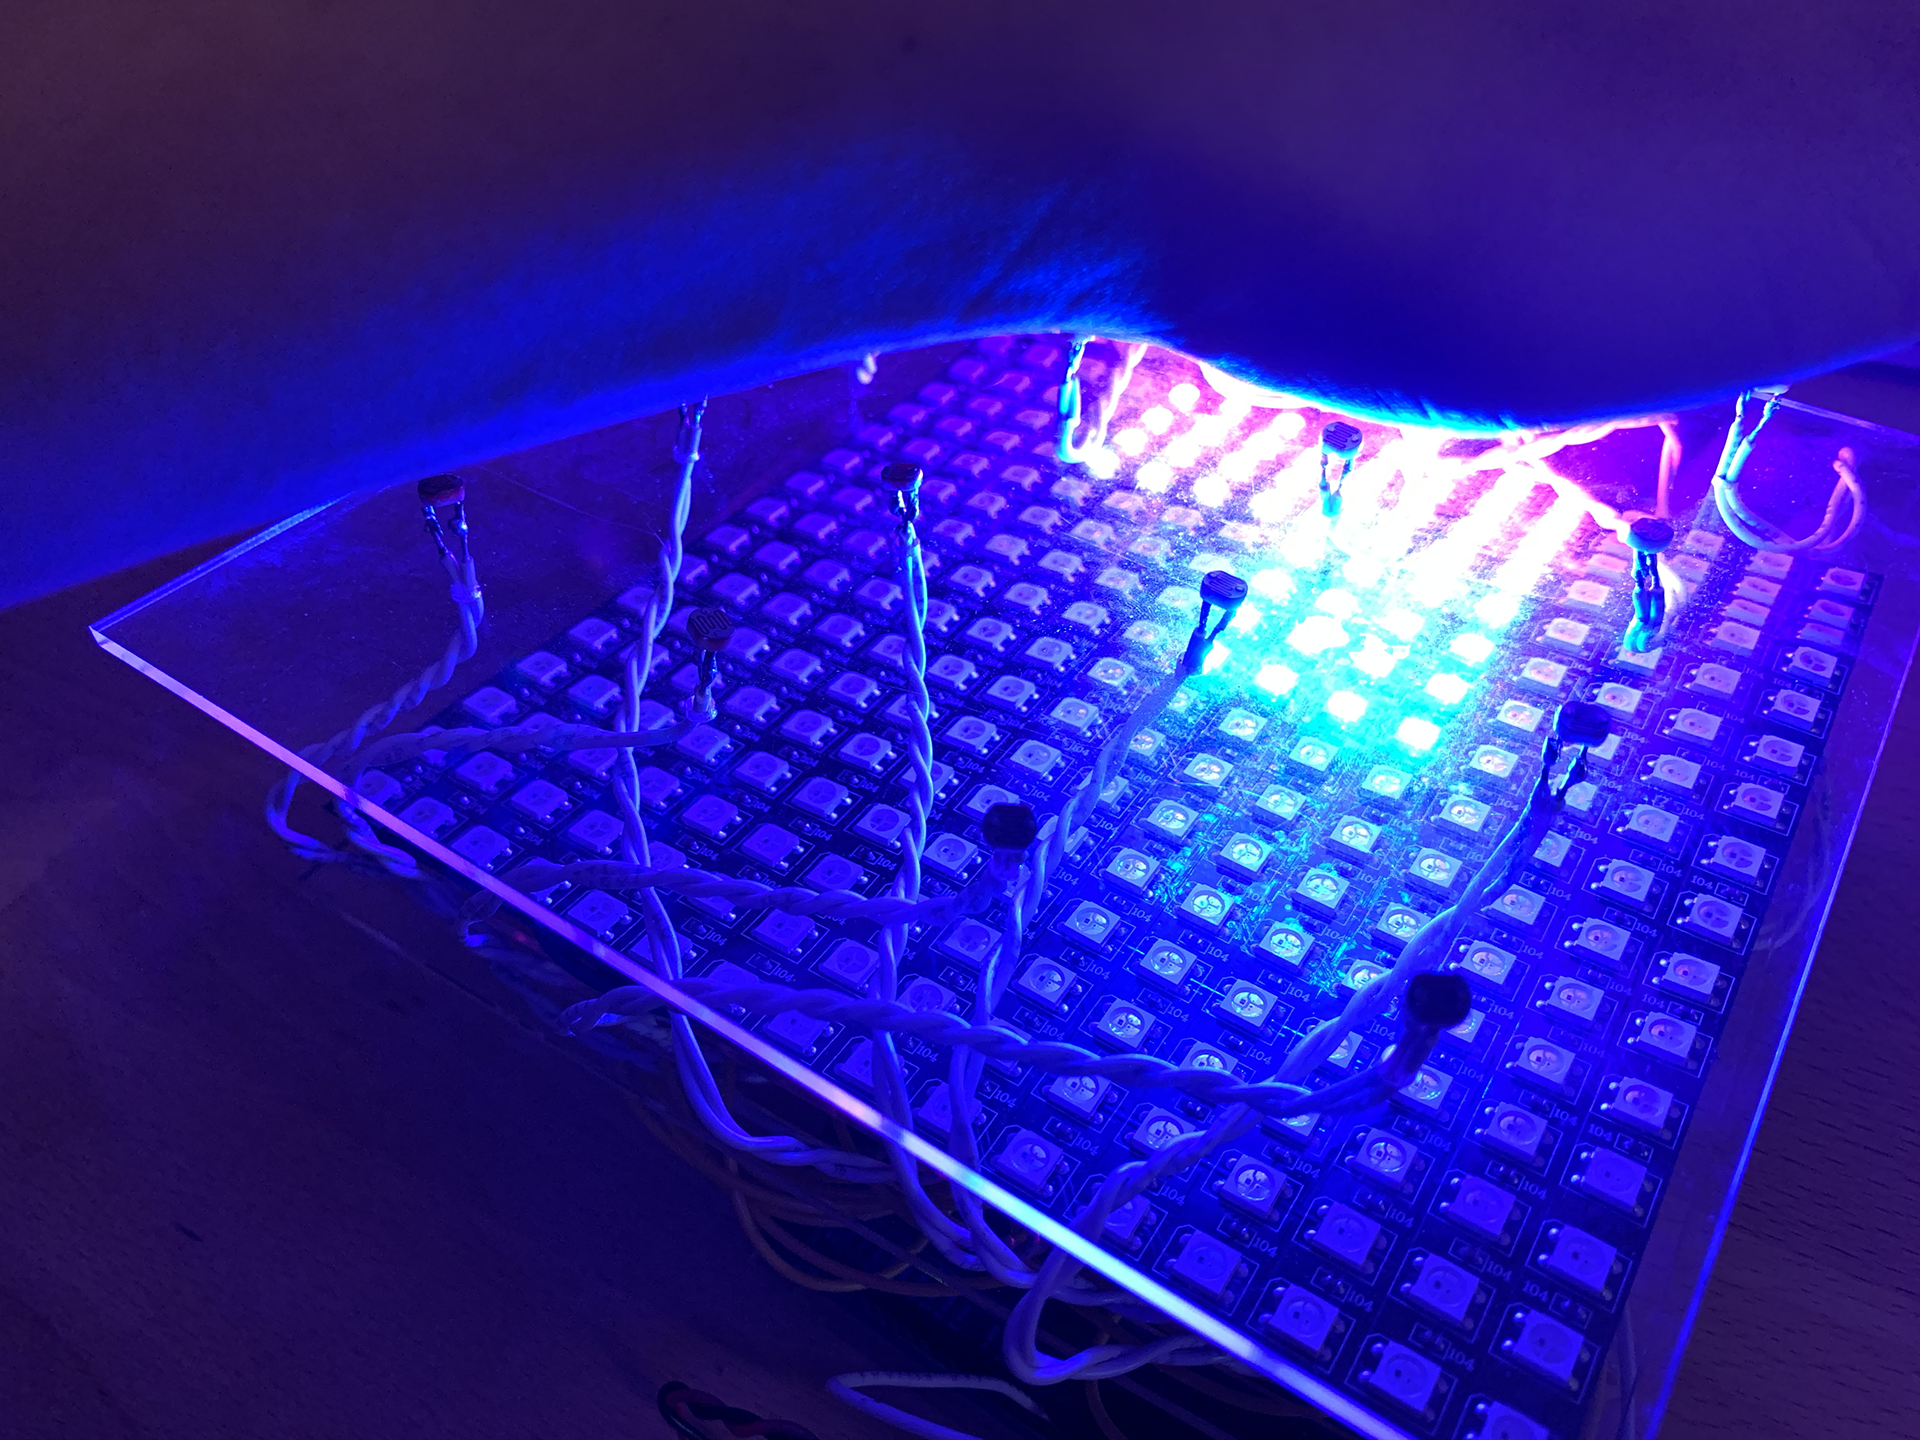
The device uses an Arduino Mega to read the sensors, and to control the sound and the lights. When selecting sensors, we chose photo-resistors because of their small size, which allowed the light to shine through unobstructed. For the sound, we used a simple Piezo speaker and powered it with an alternating current to improve the sound quality and volume. Finally, for the lights, we used a 256 RBG LED matrix.
Implementation
The device uses an Arduino Mega to read the sensors, and to control the sound and the lights. When selecting sensors, we chose photo-resistors because of their small size, which allowed the light to shine through unobstructed. For the sound, we used a simple Piezo speaker and powered it with an alternating current to improve the sound quality and volume. Finally, for the lights, we used a 256 RBG LED matrix.